O switch mais vendido da MikroTik para ISPs. Dual Boot RouterOS/SwOS, 24 portas Gigabit + 2x SFP+ 10G em 1U fanless, CPU ARM 800 MHz com 512 MB de RAM e wire-speed em Layer 1.
CRS326 vs CSS326: nao confunda. O CSS326-24G-2S+RM roda apenas SwOS (interface web simples, 2 MB de FLASH, sem roteamento). O CRS326-24G-2S+RM deste artigo e Dual Boot: pode rodar RouterOS v7 completo (com L3, firewall, VLAN filtering avancado, BGP, OSPF, etc) ou SwOS — voce escolhe conforme a necessidade. Chip Marvell 98DX3236, 512 MB de RAM e 16 MB de FLASH fazem dele um verdadeiro switch gerenciavel, nao apenas um switch smart.
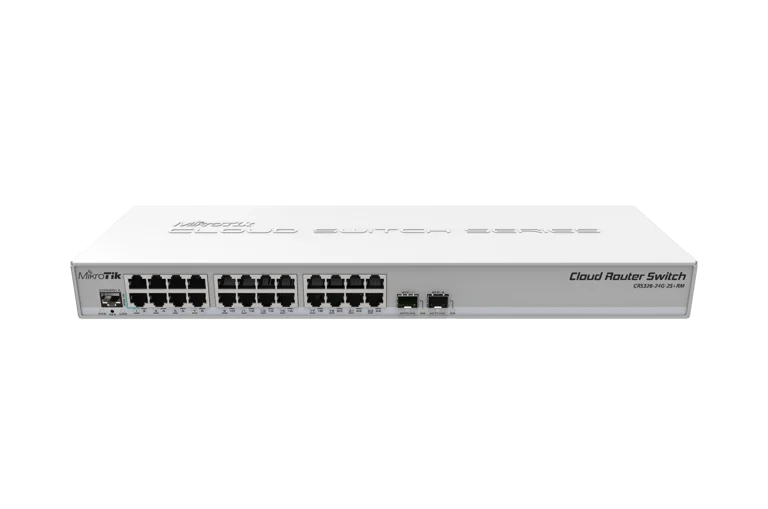
O Que Vem na Caixa
- 1x CRS326-24G-2S+RM
- 1x Rack ears
- 1x Adaptador 24V 1.2A
- 1x Conjunto de parafusos (4)
Especificacoes Tecnicas
| Especificacao | CRS326-24G-2S+RM |
|---|---|
| Switch Chip | Marvell Prestera 98DX3236 |
| CPU | ARM 32-bit, 800 MHz |
| Memoria RAM | 512 MB |
| Armazenamento | 16 MB FLASH |
| Sistema Operacional | Dual Boot: RouterOS v7 (Level 5) ou SwOS |
| Portas Ethernet | 24x 10/100/1000 Mbps Gigabit Ethernet |
| SFP+ | 2x SFP+ (1G / 10G) |
| Console Serial | 1x RJ45 |
| DC Jack | 10-30V |
| PoE-IN | Passive, 10-30V |
| PoE-OUT | Nenhum |
| Consumo Maximo | 24W |
| Refrigeracao | Passivo (fanless, silencioso) |
| Dimensoes | 443 x 144 x 44 mm (1U rackmount) |
| Protecao | IP20 |
| Temperatura de Operacao | -40 C a +60 C |
| MTBF | ~200.000h a 25 C |
| Certificacoes | CE, EAC, RoHS |
| Acesso Padrao | IP: 192.168.88.1, usuario: admin, sem senha |
| Capacidade Total | 88 Gbps (44 Gbps full-duplex), wire-speed em Layer 1 |
CPU + 512 MB de RAM fazem diferenca. Diferente do CSS326 (que so tem switch chip), o CRS326 conta com CPU ARM 800 MHz e 512 MB de RAM dedicadas. Isso permite rodar RouterOS v7 completo com roteamento L3, firewall stateful, VPN, BGP, OSPF e scripting — transformando o switch em um dispositivo multifuncional.
Voltagens
| Tipo de Entrada | CRS326-24G-2S+RM |
|---|---|
| DC Jack | 10-30V |
| PoE-IN | Passive, 10-30V |
| PoE-OUT | N/A |
| Consumo Maximo | 24W |
Diagrama de Bloco
Benchmarks Oficiais
Dados oficiais de testes em laboratorio da MikroTik. Capacidade total: 88 Gbps (44 Gbps full-duplex). Wire-speed em Layer 1 em todos os tamanhos de pacote. Fonte: mikrotik.com
Non-blocking Layer 2 Throughput
| Tamanho do Pacote | kpps | Mbps |
|---|---|---|
| 1518 Bytes | 3.576,1 | 43.427,8 |
| 512 Bytes | 10.338,3 | 42.345,9 |
| 64 Bytes | 65.476,2 | 33.523,8 |
Throughput unidirecional Layer 2 non-blocking. Fonte: mikrotik.com
Throughput Visual (Layer 2 - 1518B)
Escala: 0 - 44.000 Mbps | Pacotes 1518 Bytes
L2 Throughput 1518B
43.428 Mbps
L2 Throughput 512B
42.346 Mbps
L2 Throughput 64B
33.524 Mbps
L1 Throughput (wire-speed)
44.000 Mbps
Wire-speed em Layer 1. O Marvell 98DX3236 entrega 44.000 Mbps (44 Gbps) constantes em Layer 1, independente do tamanho do pacote. Todas as 26 portas operam em velocidade maxima simultaneamente, sem gargalos. Com Hardware Offloading ativado no RouterOS, o trafego L2 passa pelo switch chip sem tocar a CPU.
Sugestao de Aplicacao
Switch de Agregacao para ISPs Medios
Feed direto do concentrador PPPoE (CCR2004/CCR2216) via SFP+ 10G, com 24 portas Gigabit distribuindo trafego para OLTs, radios PTP e POPs. RouterOS no switch permite VLAN filtering avancado e diagnostico centralizado.
Distribuicao Gigabit com Uplink 10G
Escritorios corporativos, coworkings e prediosm comerciais: 24 estacoes em Gigabit com trunk 10G para servidor, firewall ou NAS. Fanless e silencioso — ideal para montar no rack do andar sem barulho de ventoinha.
Core Switch de Pequeno Data Center
Core Layer 2/3 compacto para data centers pequenos: LACP em SFP+ para uplink redundante, MLAG, VRRP, OSPF via RouterOS, e hardware offloading garantindo latencia previsivel. 88 Gbps agregado atende cargas densas.
Upgrade do CSS326 para Recursos L3
Substituicao direta do CSS326 quando e preciso mais que o SwOS: roteamento entre VLANs no proprio switch, firewall stateful, VLAN filtering dinamico, queues, PPPoE, DHCP e scripting. Mesma pegada fisica, recursos de router completo.
Configuracao e Integracao
1. Acesso e Configuracao Basica (RouterOS v7)
# Acesso padrao ao CRS326-24G-2S+RM (modo RouterOS)
# IP:      192.168.88.1 (porta ether1 por padrao)
# Usuario: admin
# Senha:   (em branco, sem senha)
#
# Apos o primeiro login, defina senha forte e identidade:
/user set admin password="SuaSenhaForteAqui"
/system identity set name=sw-core-crs326

# Atualize o RouterOS e o firmware do switch
/system package update check-for-updates
/system package update download
/system reboot
# Apos reiniciar:
/system routerboard upgrade
/system reboot

# Verifique licenca Level 5 (inclusa)
/system license print
2. Bridge com VLAN Filtering + Hardware Offload
# Bridge principal com VLAN filtering e HW offload no switch chip
# Essencial para wire-speed: trafego L2 passa pelo Marvell, nao pela CPU

/interface bridge
add name=bridge1 vlan-filtering=no protocol-mode=rstp \
    priority=0x3000 comment="Bridge principal"

# Adicionar todas as portas ao bridge
/interface bridge port
add bridge=bridge1 interface=ether1
add bridge=bridge1 interface=ether2
add bridge=bridge1 interface=ether3
# ... repetir para ether4 a ether24
add bridge=bridge1 interface=sfp-sfpplus1
add bridge=bridge1 interface=sfp-sfpplus2

# Verificar se o hardware offload esta ATIVO (H nas flags)
/interface bridge port print
# Flag "H" = Hardware offload ativo (desejado)
# Flag "I" = Inactive / sem offload (investigar)

# Habilitar VLAN filtering APENAS apos configurar as VLANs
# (ver proximo bloco)
3. VLANs - Trunk e Access
# Configuracao de VLANs no CRS326 via RouterOS
# Cenario:
#   VLAN 10 = Gerencia
#   VLAN 20 = Clientes
#   VLAN 30 = VoIP
#   VLAN 40 = Cameras IP
#
# Portas 1-12: access VLAN 20 (clientes)
# Portas 13-20: access VLAN 30 (VoIP)
# Portas 21-24: access VLAN 40 (cameras)
# SFP+ 1-2: trunk com todas as VLANs

# PVID nas portas access
/interface bridge port
set [find interface=ether1]  pvid=20
set [find interface=ether2]  pvid=20
# ... ether3 a ether12 = pvid 20
set [find interface=ether13] pvid=30
# ... ether14 a ether20 = pvid 30
set [find interface=ether21] pvid=40
# ... ether22 a ether24 = pvid 40

# Tabela de VLANs (tagged em SFP+, untagged em cada porta access)
/interface bridge vlan
add bridge=bridge1 vlan-ids=10 \
    tagged=bridge1,sfp-sfpplus1,sfp-sfpplus2
add bridge=bridge1 vlan-ids=20 \
    tagged=bridge1,sfp-sfpplus1,sfp-sfpplus2 \
    untagged=ether1,ether2,ether3,ether4,ether5,ether6,ether7,ether8,ether9,ether10,ether11,ether12
add bridge=bridge1 vlan-ids=30 \
    tagged=bridge1,sfp-sfpplus1,sfp-sfpplus2 \
    untagged=ether13,ether14,ether15,ether16,ether17,ether18,ether19,ether20
add bridge=bridge1 vlan-ids=40 \
    tagged=bridge1,sfp-sfpplus1,sfp-sfpplus2 \
    untagged=ether21,ether22,ether23,ether24

# Ativar VLAN filtering (AGORA, com VLANs ja configuradas)
/interface bridge set bridge1 vlan-filtering=yes
4. IP, Gateway e DNS
# Interface VLAN de gerencia (VLAN 10)
/interface vlan
add interface=bridge1 name=vlan10-mgmt vlan-id=10

# IP de gerencia do switch
/ip address
add address=10.10.10.2/24 interface=vlan10-mgmt comment="Gerencia CRS326"

# Rota padrao (apontando para o router core)
/ip route
add dst-address=0.0.0.0/0 gateway=10.10.10.1

# DNS
/ip dns
set servers=8.8.8.8,1.1.1.1 allow-remote-requests=no

# NTP para logs com timestamp correto
/system ntp client
set enabled=yes servers=a.ntp.br,b.ntp.br

# Timezone
/system clock set time-zone-name=America/Fortaleza
5. Firewall Input - Proteger Acesso ao Switch
# Proteger o proprio switch (chain input)
# Regra 1: aceitar conexoes estabelecidas
# Regra 2: aceitar ICMP
# Regra 3: aceitar apenas da VLAN 10 (gerencia)
# Regra 4: dropar o resto

/ip firewall filter
add chain=input connection-state=established,related action=accept \
    comment="Conexoes estabelecidas"
add chain=input connection-state=invalid action=drop \
    comment="Dropar invalidos"
add chain=input protocol=icmp action=accept comment="Aceitar ping"
add chain=input in-interface=vlan10-mgmt action=accept \
    comment="Gerencia: aceitar VLAN 10"
add chain=input action=drop comment="Dropar tudo que nao for gerencia"

# Servicos: desabilitar o que nao usa e trocar portas
/ip service
set telnet disabled=yes
set ftp disabled=yes
set api disabled=yes
set winbox port=8291 address=10.10.10.0/24
set ssh port=2222 address=10.10.10.0/24
set www disabled=yes
set www-ssl disabled=yes
6. Hardware Offloading - Verificar e Forcar Wire-Speed
# O switch chip Marvell 98DX3236 faz forwarding L2 em hardware (wire-speed)
# Sem HW offload, o trafego passa pela CPU ARM 800 MHz (muito mais lento)

# 1. Verificar status do HW offload em todas as portas do bridge
/interface bridge port print detail

# Para cada porta deve aparecer:
#   hw=yes        (HW offload desejado)
#   hw-offload=yes (efetivado)
# Flag "H" = Hardware, "I" = Inactive, "D" = Dynamic

# 2. Se alguma porta estiver sem HW offload, verifique:
#    - A porta pertence ao MESMO switch chip (todas aqui sao 98DX3236)
#    - STP habilitado apenas como RSTP (nao MSTP)
#    - VLAN filtering nao esta com L3 habilitado em todos os slots

# 3. Features que QUEBRAM o HW offload (evitar no bridge principal):
#    - Mirror traffic generator para destino fora do switch
#    - L3 Hardware Offloading com muitas rotas (usar feature limitada)
#    - Ingress/egress queues complexas

# 4. Monitorar CPU: se estiver alta durante trafego, HW offload falhou
/system resource monitor

# 5. Ativar switch chip stats para debug
/interface ethernet switch port print stats
/interface ethernet switch print
7. LACP Bonding em SFP+ 10G - Uplink Redundante 20G
# LACP (802.3ad) agregando os 2x SFP+ = 20 Gbps de uplink
# Obrigatorio: configurar LACP no OUTRO lado (router/switch) tambem

# 1. Remover as portas SFP+ do bridge (bonding entra no lugar)
/interface bridge port
remove [find interface=sfp-sfpplus1]
remove [find interface=sfp-sfpplus2]

# 2. Criar interface bonding LACP
/interface bonding
add name=bond-uplink mode=802.3ad \
    slaves=sfp-sfpplus1,sfp-sfpplus2 \
    lacp-rate=1sec \
    transmit-hash-policy=layer-2-and-3 \
    mii-interval=100ms \
    comment="Uplink LACP 20G para o router core"

# 3. Adicionar o bonding ao bridge
/interface bridge port
add bridge=bridge1 interface=bond-uplink

# 4. Atualizar VLANs: trocar sfp-sfpplus1/2 por bond-uplink no campo tagged
/interface bridge vlan
set [find vlan-ids=10] tagged=bridge1,bond-uplink
set [find vlan-ids=20] tagged=bridge1,bond-uplink
set [find vlan-ids=30] tagged=bridge1,bond-uplink
set [find vlan-ids=40] tagged=bridge1,bond-uplink

# 5. Verificar status do LACP
/interface bonding monitor bond-uplink
8. Seguranca - RSTP, BPDU Guard e Loop Detection
# Protecao contra loops, rogue switches e BPDUs inesperados

# 1. RSTP ja ativo no bridge (ver bloco 2). Ajustar prioridades:
/interface bridge
set bridge1 priority=0x3000 protocol-mode=rstp

# 2. BPDU Guard nas portas de acesso (ether1-24):
# Qualquer BPDU recebido derruba a porta (edge ports de clientes)
/interface bridge port
set [find interface=ether1]  edge=yes bpdu-guard=yes
set [find interface=ether2]  edge=yes bpdu-guard=yes
# ... repetir para ether3 a ether24
set [find interface=ether24] edge=yes bpdu-guard=yes

# Nao habilitar bpdu-guard nos uplinks SFP+/bond (precisam receber BPDUs)

# 3. Loop protect: detecta loops L2 e desativa a porta problematica
/interface bridge port
set [find interface=ether1]  frame-types=admit-only-untagged-and-priority-tagged
# Equivalente: aceita so untagged nas portas access (bloqueia double-tagging)

# 4. Storm control / broadcast flood (via switch chip):
/interface ethernet switch port
set ether1  ingress-rate=100M
set ether2  ingress-rate=100M
# ... ajustar conforme perfil de cada porta (limite ingress por porta)

# 5. DHCP Snooping (bloqueia rogue DHCP servers em portas access)
/ip dhcp-server
# ... (configurar DHCP snooping via bridge settings no RouterOS v7)
/interface bridge
set bridge1 dhcp-snooping=yes

# Portas confiaveis (onde o DHCP server legitimo esta):
/interface bridge port
set [find interface=bond-uplink] trusted=yes
9. Dual Boot - Alternar entre RouterOS e SwOS
# O CRS326 tem DUAL BOOT: pode rodar RouterOS OU SwOS (nao os dois ao mesmo tempo)
# Voce alterna a qualquer momento, sem perder os dois sistemas

# ==== Estando no RouterOS, voltar para o SwOS ====
# 1. Verificar o sistema atual
/system routerboard settings print
# Observe o campo: boot-os

# 2. Alternar para SwOS (em RouterOS v7)
/system routerboard settings set boot-os=swos
/system reboot

# Apos o reboot, o switch estara rodando SwOS
# Acesse via http://192.168.88.1 (usuario admin, sem senha)

# ==== Estando no SwOS, voltar para o RouterOS ====
# 1. Acesse o SwOS em http://192.168.88.1
# 2. Aba "System" -> campo "Boot OS"
# 3. Selecione "RouterOS" e clique em "Apply"
# 4. Reinicie (botao "Reboot")
#
# Ou via terminal do SwOS (aba Upgrade):
# Basta alternar o campo Boot OS para RouterOS e dar reboot

# ==== Reset completo ====
# Se precisar voltar ao padrao de fabrica, mantenha pressionado o botao
# de reset durante o boot (antes do LED User acender) por 5 segundos
# para reset do RouterOS, ou 10 segundos para Netinstall/recovery

# Dica: para provedores e tecnicos, comece com SwOS (simples) e migre
# para RouterOS quando precisar de L3, firewall ou scripting
RouterOS v7 + Hardware Offloading. Os scripts acima assumem RouterOS v7 rodando no proprio CRS326. O segredo do desempenho e manter o hardware offloading ativo (flag "H" nas portas do bridge), para que o forwarding L2 aconteca no switch chip Marvell 98DX3236 e nao na CPU. A CPU ARM 800 MHz cuida apenas do plano de controle (STP, gerencia, firewall input, routing em pequena escala).