O workhorse PoE 24 portas da MikroTik. 24 portas Gigabit com PoE 802.3af/at + passive + 4x uplinks SFP+ 10G em 1U, fonte interna de 500W e Dual Boot RouterOS v7 / SwOS v2.18.
O Que Vem na Caixa
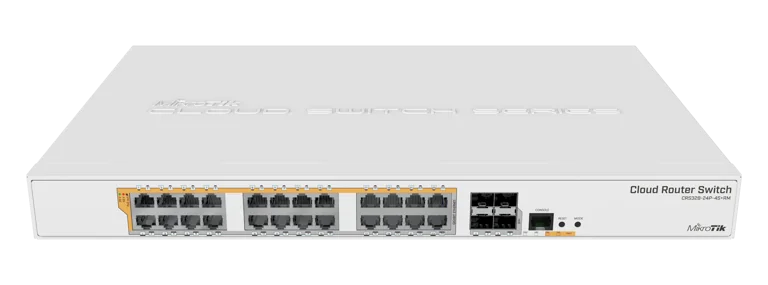
- 1x CRS328-24P-4S+RM
- 1x Cabo de forca AC (100-240V)
- 1x Rack ears (kit de fixacao 19")
- 1x Conjunto de parafusos
Especificacoes Tecnicas
| Especificacao | CRS328-24P-4S+RM |
|---|---|
| Switch Chip | Marvell Prestera 98DX3236 |
| CPU | ARM 32-bit 1-core @ 800 MHz |
| Memoria RAM | 512 MB |
| Armazenamento | 16 MB FLASH |
| Sistema Operacional | Dual Boot: RouterOS v7 / SwOS v2.18 |
| Portas Ethernet | 24x 10/100/1000 Mbps Gigabit Ethernet (com PoE) |
| SFP+ | 4x SFP+ (1G / 10G) |
| Console | 1x RJ45 serial console |
| PoE-OUT | 802.3af/at + Passive PoE + low-voltage PoE (Ether1 a Ether24) |
| PoE Maximo por Porta | 30W (802.3at) |
| Budget PoE Total | 20A de saida total (aprox. 500W) |
| Fonte de Alimentacao | Fonte interna 500W, AC 100-240V |
| Consumo Maximo | 494W (com PoE) / 44W (idle) |
| Refrigeracao | Ativa - 2 ventiladores internos |
| Dimensoes | 443 x 300 x 44 mm (1U rackmount) |
| Temperatura de Operacao | -20 C a +60 C |
| Certificacoes | CE, EAC, RoHS, Anatel |
| Acesso Padrao | IP: 192.168.88.1, usuario: admin, sem senha |
| Capacidade Total | 128 Gbps full-duplex (24x 1G + 4x 10G) |
Dual Boot RouterOS + SwOS. O CRS328-24P-4S+RM permite escolher entre RouterOS v7 (com firewall, VLAN filtering, OSPF/BGP, hotspot) ou SwOS v2.18 (interface web simplificada para switching puro). Troca de SO sem reinstalar firmware.
Voltagens e PoE
| Tipo | CRS328-24P-4S+RM |
|---|---|
| AC Input | 100-240V AC (fonte interna 500W) |
| PoE-OUT (Ether1-24) | 802.3af/at + Passive PoE + low-voltage PoE |
| PoE Max por Porta | 30W (802.3at) / 15.4W (802.3af) |
| Budget PoE Total | 20A total (aprox. 500W) |
| Consumo Idle | 44W (sem carga PoE) |
| Consumo Maximo | 494W (carga PoE total) |
PoE universal em todas as 24 portas. Compatibilidade automatica com APs MikroTik (passive PoE 24V), APs Ubiquiti/Mimosa (802.3af/at), cameras IP e telefones VoIP (802.3af/at). Protecao por porta contra sobrecarga e curto-circuito.
Diagrama de Bloco
Benchmarks Oficiais
Dados oficiais de testes em laboratorio da MikroTik para pacotes 64 Bytes (worst-case). Capacidade total: 128 Gbps full-duplex. Fonte: mikrotik.com
Non-blocking Layer 2 Throughput (64B)
| Tamanho do Pacote | kpps | Mbps |
|---|---|---|
| 64 Bytes | 95.238,1 | 48.761,9 |
Throughput unidirecional Layer 2 non-blocking para pacotes 64B (worst-case). Fonte: mikrotik.com
Throughput Visual (64 Bytes)
Escala: 0 - 128.000 Mbps | Pacotes 64B (worst-case)
L2 Throughput 64B
48.762 Mbps
L1 Throughput 64B (wire-speed)
64.000 Mbps
L2 Capacity full-duplex 64B
97.524 Mbps
L1 Capacity full-duplex (teorico)
128.000 Mbps
Wire-speed em Layer 1. O Marvell 98DX3236 entrega 64.000 Mbps (64 Gbps) constantes em Layer 1 para o pior cenario (pacotes 64B). Todas as 28 portas (24x 1G + 4x 10G) operam em velocidade maxima simultaneamente sem gargalos.
Sugestao de Aplicacao
Distribuicao PoE para 24 APs Wi-Fi
Alimenta ate 24 pontos de acesso Wi-Fi simultaneamente (802.3af/at) em hoteis, escritorios medios e escolas. Uplink 10G via SFP+ para o router central, eliminando gargalos entre APs e core.
Centro de Vigilancia CFTV
Switch PoE principal para centros de vigilancia com muitas cameras IP (af/at). 500W de budget total entrega ate 30W por porta, alimentando cameras PTZ, dome e bullet com infravermelho.
Telefonia IP + APs Corporativa
Alimenta telefones VoIP (802.3af) e APs Wi-Fi corporativos (802.3at) em redes corporativas medias. VLAN de voz isolada via RouterOS, QoS por porta e LACP nos uplinks SFP+ 10G.
Solucao Unica 1U (Patch + Switch + Injector)
Substitui patch-panel + switch convencional + injector PoE externo por uma unica solucao 1U. Fonte interna AC, sem injector externo, 24 portas PoE prontas para uso no rack 19".
Configuracao e Integracao
1. Acesso e Configuracao Basica (RouterOS v7)
# Acesso padrao ao CRS328-24P-4S+RM (modo RouterOS)
# 1. Conecte cabo Ethernet em qualquer porta 1-24
# 2. Configure seu PC com IP na faixa 192.168.88.x
# 3. Acesse via:
#    WinBox:   192.168.88.1 (MAC ou IP)
#    WebFig:   http://192.168.88.1
#    SSH:      ssh admin@192.168.88.1
#    Usuario:  admin | Senha: (em branco)
#
# Definir identidade e senha de admin
/system identity set name=crs328-core
/user set admin password=SenhaForteAqui123!

# Atualizar firmware e RouterOS
/system package update check-for-updates
/system package update download
/system reboot
2. Bridge com VLAN Filtering + Hardware Offload
# Bridge principal com VLAN filtering e HW offloading no chip 98DX3236
/interface bridge
add name=bridge-main vlan-filtering=no protocol-mode=rstp

# Adicionar todas as portas ao bridge (HW offload automatico)
/interface bridge port
add bridge=bridge-main interface=ether1
add bridge=bridge-main interface=ether2
add bridge=bridge-main interface=ether3
# ... (repetir para ether4 ate ether24)
add bridge=bridge-main interface=ether24
add bridge=bridge-main interface=sfp-sfpplus1
add bridge=bridge-main interface=sfp-sfpplus2
add bridge=bridge-main interface=sfp-sfpplus3
add bridge=bridge-main interface=sfp-sfpplus4

# Verificar hardware offload
/interface bridge port print detail where hw=yes
3. VLANs (Voz, Dados, Seguranca, Guests)
# Configurar VLANs no bridge (HW offload suportado)
/interface bridge vlan
# VLAN 10 - Dados corporativos (portas 1-12)
add bridge=bridge-main vlan-ids=10 \
    tagged=bridge-main,sfp-sfpplus1 \
    untagged=ether1,ether2,ether3,ether4,ether5,ether6,ether7,ether8,ether9,ether10,ether11,ether12

# VLAN 20 - Voz (telefones IP portas 13-18)
add bridge=bridge-main vlan-ids=20 \
    tagged=bridge-main,sfp-sfpplus1 \
    untagged=ether13,ether14,ether15,ether16,ether17,ether18

# VLAN 30 - Seguranca / Cameras IP (portas 19-22)
add bridge=bridge-main vlan-ids=30 \
    tagged=bridge-main,sfp-sfpplus1 \
    untagged=ether19,ether20,ether21,ether22

# VLAN 40 - Guests / Wi-Fi visitantes (portas 23-24)
add bridge=bridge-main vlan-ids=40 \
    tagged=bridge-main,sfp-sfpplus1 \
    untagged=ether23,ether24

# Configurar PVIDs por porta
/interface bridge port
set [find interface=ether1] pvid=10
set [find interface=ether13] pvid=20
set [find interface=ether19] pvid=30
set [find interface=ether23] pvid=40

# Ativar VLAN filtering (HW offload preservado)
/interface bridge set bridge-main vlan-filtering=yes
4. IP, Gateway e DNS (Interface de Gerencia)
# Criar VLAN 99 para gerencia do switch
/interface vlan
add interface=bridge-main name=vlan99-mgmt vlan-id=99

# IP de gerencia fixo
/ip address
add address=10.0.99.10/24 interface=vlan99-mgmt

# Gateway default (router upstream)
/ip route
add dst-address=0.0.0.0/0 gateway=10.0.99.1

# DNS
/ip dns
set servers=8.8.8.8,8.8.4.4,1.1.1.1 allow-remote-requests=no

# NTP (sync de horario)
/system ntp client
set enabled=yes servers=pool.ntp.br

# Tag VLAN 99 no bridge
/interface bridge vlan
add bridge=bridge-main vlan-ids=99 tagged=bridge-main,sfp-sfpplus1
5. Firewall Input (Proteger o Switch)
# Firewall input: proteger o proprio switch
/ip firewall filter
# Permitir trafego estabelecido e relacionado
add chain=input connection-state=established,related action=accept
# Permitir ICMP (ping)
add chain=input protocol=icmp action=accept
# Permitir acesso apenas da rede de gerencia
add chain=input src-address=10.0.99.0/24 action=accept comment="Acesso gerencia"
# Dropar loopback e invalido
add chain=input connection-state=invalid action=drop
# Bloquear tudo mais
add chain=input action=drop comment="Drop all other input"
6. Switch Chip Hardware Offloading (98DX3236)
# Verificar hardware offload no switch chip
/interface ethernet switch
print

# Verificar quais recursos estao em hardware
/interface ethernet switch port
print

# Estatisticas do switch chip (velocidade real, pacotes, erros)
/interface ethernet switch port-stats print

# Verificar bridge HW offload ativo
/interface bridge port print detail where hw=yes

# Monitorar trafego em hardware (nao CPU)
/interface ethernet monitor [find] once
# IMPORTANTE: Com HW offload ativo, o trafego flui no chip
# 98DX3236 sem tocar a CPU ARM 800 MHz. Isto garante
# wire-speed em todas as 24 portas GbE + 4 SFP+ 10G.
7. Gerenciamento PoE por Porta (af/at + Passive)
# Listar status PoE em todas as portas
/interface ethernet poe print
/interface ethernet poe monitor [find] once

# Habilitar PoE em porta especifica (auto negocia af/at)
/interface ethernet poe
set ether5 poe-out=auto-on

# Configurar PoE passivo (para APs MikroTik 24V)
/interface ethernet poe
set ether10 poe-out=forced-on poe-priority=10

# Desabilitar PoE em porta (ex: uplink)
/interface ethernet poe
set ether24 poe-out=off

# Definir prioridade PoE (quando budget esta no limite)
# 0=mais alta, 99=mais baixa
/interface ethernet poe
set ether1 poe-priority=10 comment="AP principal"
set ether2 poe-priority=20 comment="Camera CFTV"
set ether24 poe-priority=90 comment="Porta secundaria"

# Monitorar consumo PoE total
/interface ethernet poe monitor [find] once
# Mostra: poe-out-status, poe-out-voltage, poe-out-current, poe-out-power
8. LACP Bonding nos SFP+ 10G (40G agregados)
# Agregar os 4x SFP+ 10G em um link LACP de 40G
/interface bonding
add name=bond-uplink40g slaves=sfp-sfpplus1,sfp-sfpplus2,sfp-sfpplus3,sfp-sfpplus4 \
    mode=802.3ad transmit-hash-policy=layer-3-and-4 lacp-rate=1sec

# Adicionar o bond ao bridge (substitui os SFP+ individuais)
/interface bridge port
remove [find interface=sfp-sfpplus1]
remove [find interface=sfp-sfpplus2]
remove [find interface=sfp-sfpplus3]
remove [find interface=sfp-sfpplus4]
add bridge=bridge-main interface=bond-uplink40g

# Tag das VLANs no bond
/interface bridge vlan
set [find vlan-ids=10] tagged=bridge-main,bond-uplink40g
set [find vlan-ids=20] tagged=bridge-main,bond-uplink40g
set [find vlan-ids=30] tagged=bridge-main,bond-uplink40g
set [find vlan-ids=40] tagged=bridge-main,bond-uplink40g
set [find vlan-ids=99] tagged=bridge-main,bond-uplink40g

# Verificar status LACP
/interface bonding monitor bond-uplink40g
# IMPORTANTE: O switch upstream (CCR2216, CRS518 etc) tambem
# precisa ter LACP configurado com os mesmos 4 links.
9. Seguranca: Storm Control + RSTP
# Storm Control (limitar broadcast/multicast por porta)
# Protege a rede de loops e tempestades
/interface bridge port
set [find interface=ether1] broadcast-flood=yes multicast-flood=yes \
    unknown-unicast-flood=yes
# Para portas de acesso (clientes) use rate-limit via queue

# Queue simples por porta para limitar broadcast
/queue simple
add name=limit-broadcast-ether1 target=ether1 \
    max-limit=100M/100M

# RSTP (Rapid Spanning Tree) - proteger contra loops L2
/interface bridge set bridge-main protocol-mode=rstp
/interface bridge port
set [find interface=ether1] edge=yes bpdu-guard=yes
set [find interface=ether2] edge=yes bpdu-guard=yes
# BPDU Guard: se receber BPDU em porta edge, desabilita a porta

# MAC address limit por porta (prevenir MAC flooding)
/interface bridge port
set [find interface=ether1] unknown-unicast-flood=no

# Loop Protect (detectar loops em tempo real)
/interface ethernet
set ether1 loop-protect=on loop-protect-send-interval=5s \
    loop-protect-disable-time=5m

# Verificar status RSTP
/interface bridge monitor bridge-main
/interface bridge port monitor [find]
Dual Boot: alterne entre RouterOS e SwOS. Para alternar entre modos, use
/system routerboard settings set boot-os=swos (ou router-os) e reinicie. No SwOS, a administracao e via web (http://192.168.88.1), com foco em VLANs, port isolation, mirror e PoE. Para configuracoes avancadas (firewall, DHCP, QoS, OSPF/BGP, hotspot), mantenha RouterOS.